DocuSign is an effective and flexible third party tool to keep the bond between businesses and customers by integrating with Salesforce. This article explores more about configurable steps to integrate DocuSign with Salesforce in a much simpler way.
- Types of DocuSign Account
- Setting up Connect in DocuSign
- Creating Custom Tags
- Templates
- Custom Button Parameters
- Demo
Types of DocuSign Account
There are two types of DocuSign Accounts available. They are:
- Developer Sandbox
- Production
Developer Account
- Developer Sandbox is the demo account used to test our functionality and then move it to production instance once everything is working fine.
- Free Account
- Developer Sandbox login URL: https://demo.docusign.net
Production Account
- Main account used to synchronize with Salesforce Production.
- Paid Account
- Production Account login URL: https://account.docusign.com/#/web/login

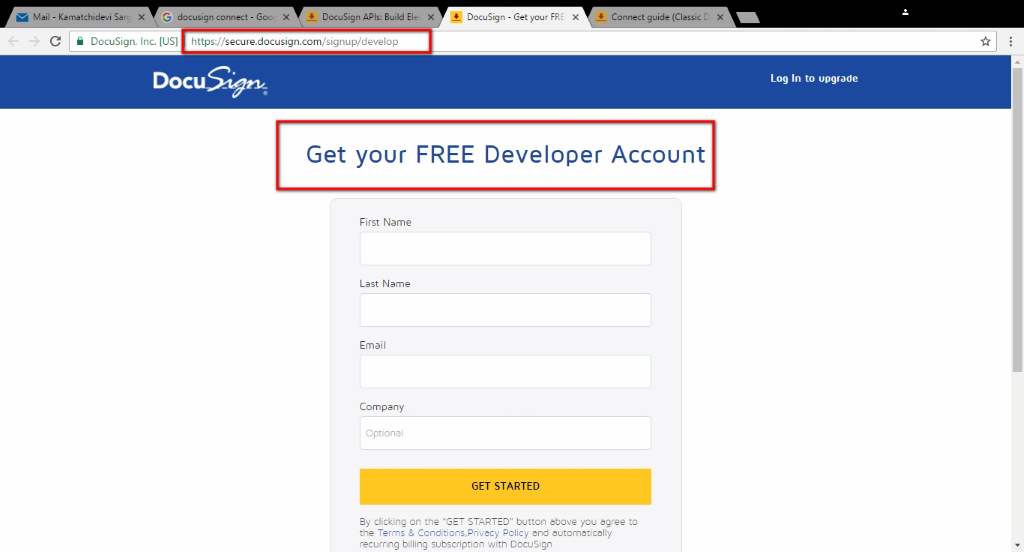
Creating the DocuSign Developer Account
To create a developer account, you need to go to following URL https://secure.docusign.com/signup/develop and fill in the details needed and click on “Get Started”.
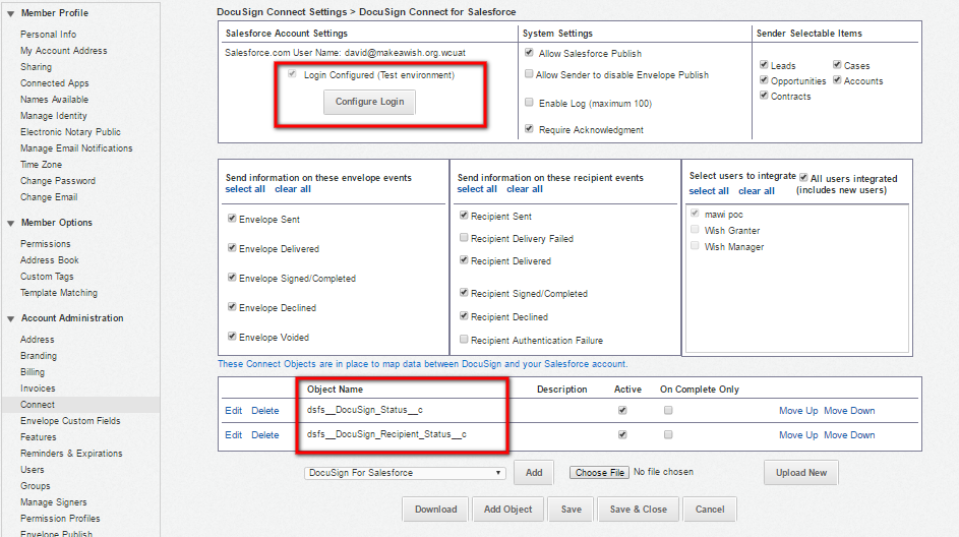
Setting up Connect in DocuSign
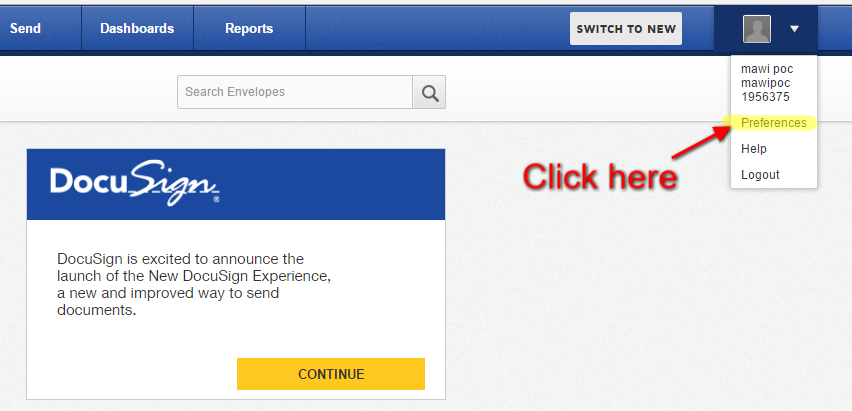
Once you have logged in to the DocuSign account, you will find the Preference or account settings to set up the connections. On the top right corner of the DocuSign Account, click on Your name > Preference > Account Administration > Connect.
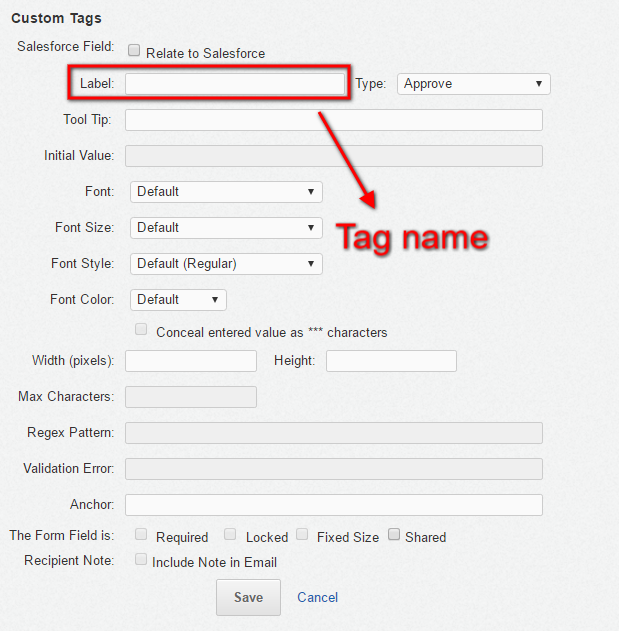
Custom Tags
Custom Tags are only supported in certain DocuSign plans. Custom Tags are customized fields that you can create and use in the envelopes. To create a custom tag, go to Preference > Member Options > Custom Tags. Click the Add button.
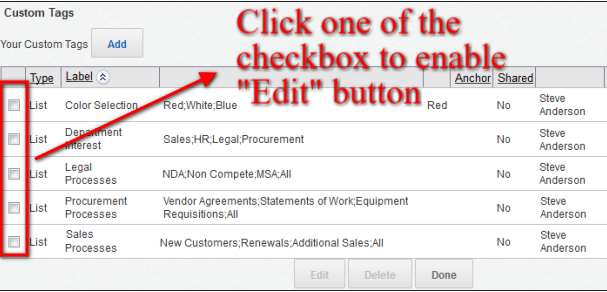
Editing Custom Tags
To edit custom tag, go to Preference > Member Options > Custom Tag. Select any one of the tags at a time to enable the Edit button. Click the Edit button to do any changes in the custom tag.
Deleting Custom Tags
To Delete custom tag/tags, go to Preference > Member Options > Custom Tag. Select any one or all the tags you would like to delete at a time and to enable the Delete button. Click the Delete button to delete the selected custom tag(s).
Templates
Templates are the documents we refer to send through the envelopes. Templates can be created in DocuSign in two ways as shown below,
- New Template
- Upload Templates
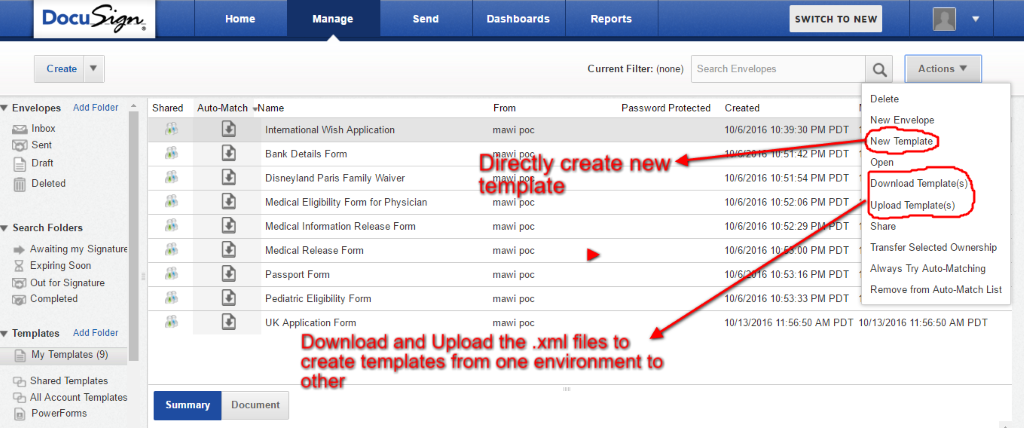
New Template
Directly create a new template.
File format [Symbol] https://www.docusign.com/DocuSignHelp/Content/supported-file-formats.htm
Note: DocuSign does not support files with password security enabled. To send a file with password security, remove the security setting before uploading the file.
Upload Template
Upload the .xml file that was downloaded from another DocuSign environment.
Custom Button Parameters
Custom button configuration is supported by using the Salesforce Custom Buttons and Links functionality to create Detail Page Buttons that contain “On Click JavaScript.” The JavaScript logic determines what custom actions are performed by the button.
Required Parameters
These parameters are required for all custom buttons:
DocuSign Envelope ID

DSEID = 0

Salesforce Object Source ID

SourceID = {!SFObject.Id}
This is the Salesforce merge field for the id of the object in which the button is to be placed.
Example: If you are creating a button in the Account Layout, use SourceID = {!Accounts.Id}; if in the Opportunity Layout, use SourceID = {!Opportunity.id}.
Some of the important but optional parameters
OCO [Symbol] One Click Options
It has two values “Send” or “Tag”. If you use “Send”, then default standard view to send document is not shown; when you directly click the button, the documents will be sent. For “Tag” , it is vice versa.
RES [Symbol] Reminder and Expiration Settings
There are six comma-separated settings for this parameter: Remind Via Email, Remind In N Days, Repeat Remind In N Days, Expire-Void Envelope, Expire-Void Envelope In N Days, Warn Expire Void In N Days.
Example: If RES = ‘1,2,3,1,120,3’;, then the system will send an email reminder, the reminder is sent 2 days after the original email, the reminder is repeated every 3 days, the envelope will expire/void, the envelope will expire/void in 120 days, and an email warning that the envelope will expire/void is sent 3 days before the expiration.
CEM [Symbol] Custom Email Message
The message text string supports the use of custom tags, such as: [FirstName] = sender first name, [LastName] = sender last name, and [Email] = sender email. The text string also supports Salesforce merge fields.
Example: CEM=’Envelope sent by [FirstName] [LastName] ([Email]) for {!Opportunity.Name}’;
CES [Symbol] Custom Email Subject
A text string with the email subject. This will also support the merge Fields.
CRL [Symbol] Custom Recipient List
The recipient information can be specified directly, or it can be derived from the object where the button is placed. You can specify multiple comma-separated recipients but the length of the entire CRL string must be 1000 characters or less. Single Recipient name can hold up to 80 characters.
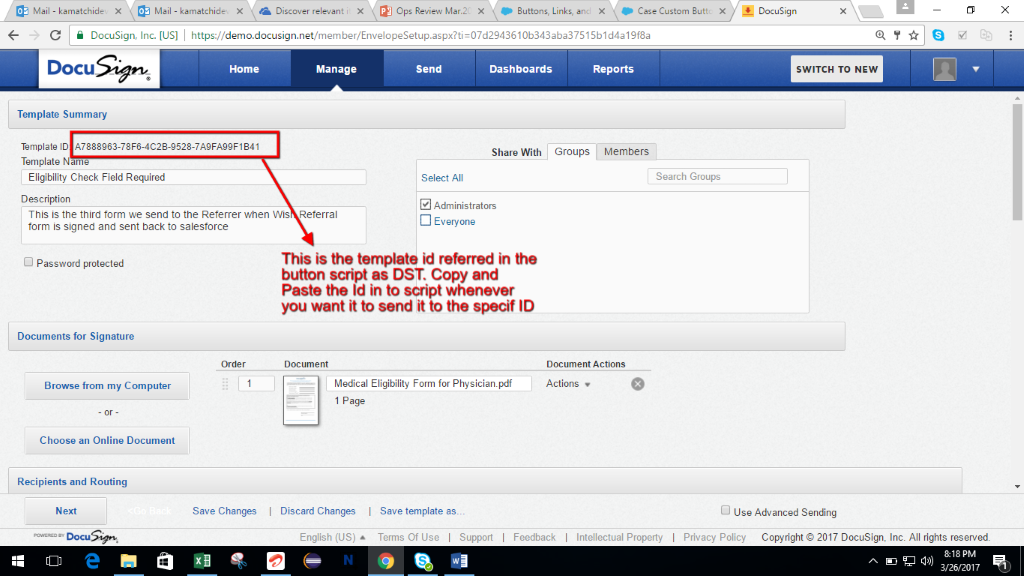
DST [Symbol] DocuSign Template
This represents the Template Id of the document that is going to be sent to the recipient for signing.
LA [Symbol] Load Attachment
It contains the values “0” means OFF or “1” means ON. When ON, all items in Attachments are added to the envelope. This parameter is typically used with the DocuSign Template option since the documents are supplied by the template. If no value is supplied, this parameter defaults to ON.
Sample Script
Install DocuSign For Salesforce in your Salesforce account. Refer the article which will clearly explain the steps to install DocuSign for Salesforce. Go to the object in which you should create DocuSign Button to send documents dynamically and add the following JavaScript to that custom button.
{!REQUIRESCRIPT("/soap/ajax/30.0/connection.js")}
{!REQUIRESCRIPT("/support/console/30.0/integration.js")}
{!REQUIRESCRIPT("/apex/dsfs__DocuSign_JavaScript")}

var CRL;
var OCO='tag';
CRL='Email~{!Contact.Email};LastName~{!Case.Contact}';
CES = ‘Sample Email Subject';

DST = ‘A7888963-78F6-4C2B-9528-7A9FA99F1B41’; //This is the template Id copied from DocuSign

window.open('/apex/dsfs__DocuSign_CreateEnvelope?DSEID=0&SourceID={!Case.Id}&DST=’+DST+’&CRL='+CRL+'&CES='+CES,'_blank'); //Works on classic view
DST Id can be appended to the script from the DocuSign as below.
You can follow any one of the below steps to send append DocuSign template Ids in the script parameter.
- Copy the Id of the DocuSign Template and paste it here in script.
- Create a Multi picklist field to hold the DST Id and split the Ids to give DST in a string separated by comma.
- Create separate object and based on condition query in the custom button script. Add to a list and then attach it as a comma separated string.
Reference Links
- To learn more about the steps to install DocuSign for Salesforce in your salesforceenvironment, please check the following link. https://www.mstsolutions.com/blog/content/docusign-integration-salesforce-using-api