Objective:
We want to maintain the uploaded file’s details for each customer/person record into Marketo Lead whenever that customer / person is submitting the Marketo Form from the Landing Page or Web Page.
Description:
When a business wants to capture the customer/person details along with uploaded files during Marketo Form Submission. Marketo does not have a file upload feature/functionality. For that we have an external tool i.e., ‘File Upload Care’ to maintain the uploaded files URL inside Marketo Lead. This instance will only capture the files (supporting all file formats) and has allocated storage space based on pricing. It is not a direct add-on or plug-in process with Marketo but we can do it with minimal customization to capture the uploaded file URLs from ‘File Upload Care’ to Marketo Lead.
Overview:
Here is a description of Marketo and File Upload Care Tools.
Marketo:
- Marketo is a marketing Software as a Service (SaaS) platform designed to help business assess and automate marketing tasks. Marketo is owned by Adobe, and it is headquartered in San Mateo, California.
- This is a powerful and easy to use for fast-growing small companies and global enterprises. It allows companies to launch their first campaign in days and scale to meet the needs of the most complex global enterprise.
- The marketing technology enables us to do lead management, marketing automation, lead scoring, account-based marketing, digital advertising, email marketing, real-time personalization, reporting, marketing ROI, campaigning, event marketing, instant CRM integration, and so much more
File Upload Care:
- Uploadcare handles uploading files by maintaining a growing collection, storing, processing, and intelligent delivery via CDN. It will save resources and build the file infrastructure, optimize your content, conversions, load times, traffic, and UX.
- The uploaded files are hosted on their CDN. We can use this tool to transform and optimize images, process videos, convert documents, and a lot more. All files hosted on Uploadcare CDN are served with smart format and quality optimizations to ensure the smallest file size while preserving the visual quality.
Implementation:
The Uploadcare feature needs to work with Marketo using Form and Landing Page. The following are the implementation steps:
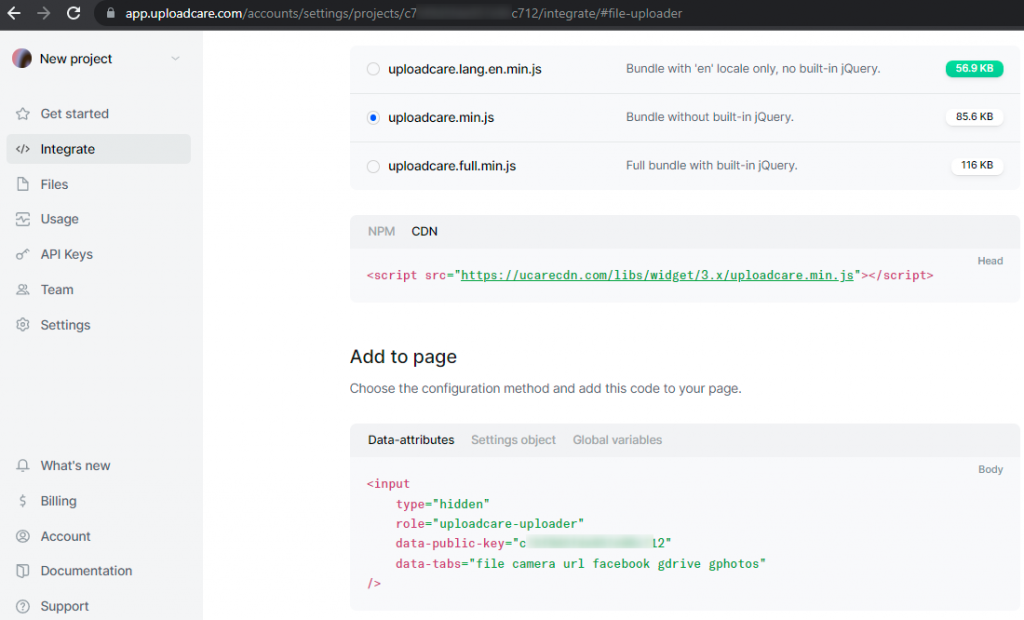
- Once we buy the UploadCare Account, we get the Public Key, JS, and CDN Links.
- Log into Marketo.
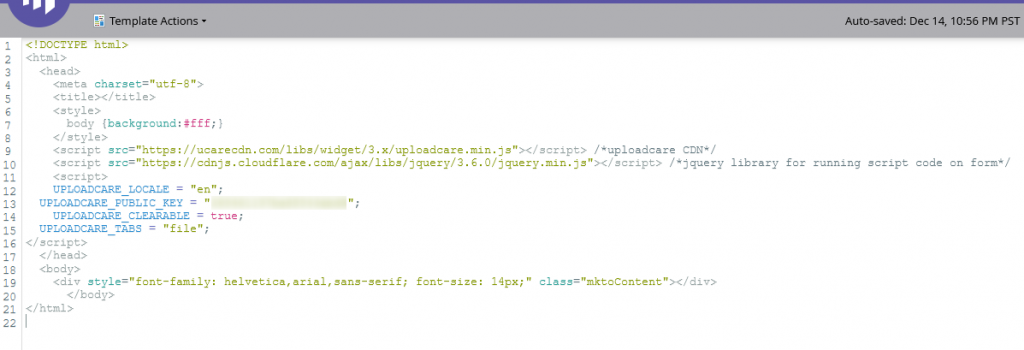
- Navigate to Design Studio -> Landing Page Template.
- Create a new free form Marketo Landing Page Template.
- Implement the below code in <head> tag of that template.
<script src=”https://ucarecdn.com/libs/widget/3.x/uploadcare.min.js”></script>
<script src=”https://cdnjs.cloudflare.com/ajax/libs/jquery/3.6.0/jquery.min.js”></script>
<script>
UPLOADCARE_LOCALE = “en”;
UPLOADCARE_PUBLIC_KEY = “xxxxxxxxxxxxxxxxxx”; //To replace the PUBLIC KEY once own the instance.
UPLOADCARE_CLEARABLE = true;
UPLOADCARE_TABS = “file”;
</script>
Note:
If we want to implement it on an external web page instead of Marketo Landing Page Template, we can use this script code to implement it on the web page in the head tag.
- Approve and Close the Landing Page Template.
- Create two new custom fields for maintaining and formatting the uploaded file URLs on those fields.
- One field for storing the Main URL.
- Another field for formatting and storing from main URL.
- Navigate to Marketing Activities -> Choose the Program -> Create a new Form.
- Add the necessary Form Fields (First Name, Last Name, Email, Company, etc.)
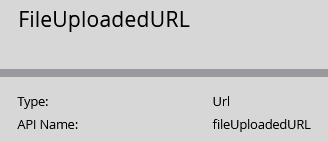
- Add two hidden fields in that form (FileUploadURL & FileUploadedMultipleURLs).
- Add the RichText box in that form.
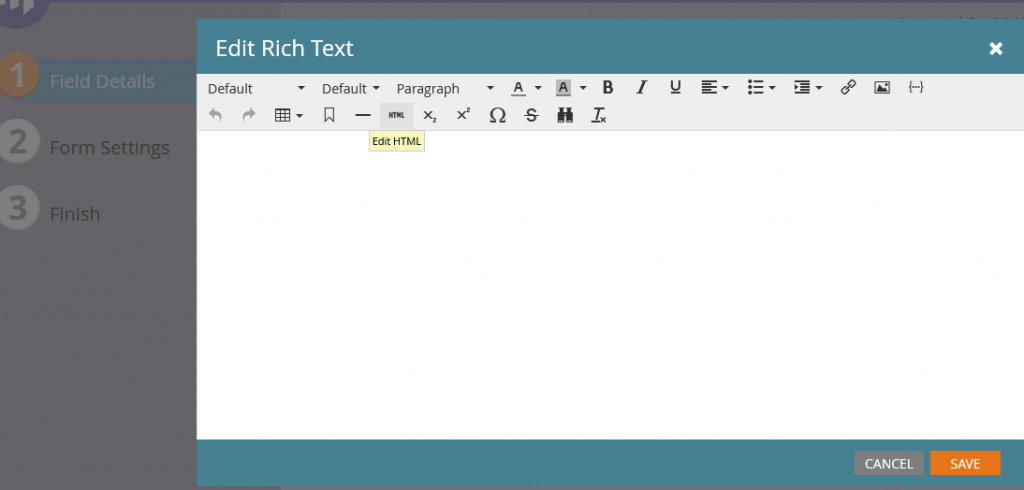
- Click the Edit the HTML tab to add the below uploadscript and JavaScript code.
| /* For accessing the uploadcare choose file button script to appearing the choose file button and accepting the specified file format*/ <script type=”text/javascript”> $(document). ready (function () { setTimeout(function () { $(‘input[name=fileUploadedURL]’).attr(‘role’,’uploadcare-uploader’). $(‘input[name=fileUploadedURL]’).attr(‘data-multiple’,’true’). $(‘input[name=fileUploadedURL]’).attr(‘data-multiple-min’,’1′). $(‘input[name=fileUploadedURL]’). attr(‘data-file-types’,’.pdf .png .jpg .jpeg .doc .docx’). $(‘input[name=fileUploadedURL]’).attr(‘data-input-accept-types’,’.pdf, .png, .jpg, .jpeg, .doc, .docx, .jpgx’). }, 1000); }); </script> |
| /* For storing the uploaded file URL and formatting the URL then storing into hidden fields */ <script>// <![CDATA[ MktoForms2.whenReady(function (form) { form.onValidate(function () { var getURL = $(“input[name=fileUploadedURL]”).val()+ $(‘.uploadcare–widget__file-name’).text(). var str = getURL.toString(). var rest = str.substring(0, str.lastIndexOf(“/”) + 1). var last = str.substring(str.lastIndexOf(“/”) + 1, str.length); var f1 = last.split(” “, 1). var Result=””. if (parseInt(f1) > 0){ for (var i=0; i < parseInt(f1); i++) { var r1 = rest + “nth/” + i +”/”. Result += r1 + ” “. } } $(“input[name=fileUploadedMultipleURLs]”).val(Result). var getUploadedURL = $(“input[name=fileUploadedURL]”).val(). var getFileName = $(‘.uploadcare–widget__file-name’).text () $(“input[name=fileUploadedURL]”).val(getUploadedURL+getFileName); }); }) // ]]></script> |
- Then, approve and close the form.
- Create a new Landing Page and choose the updated uploadcare code Landing Page Template.
- Add the Form into Landing Page.
- Approve and Close the Landing Page.
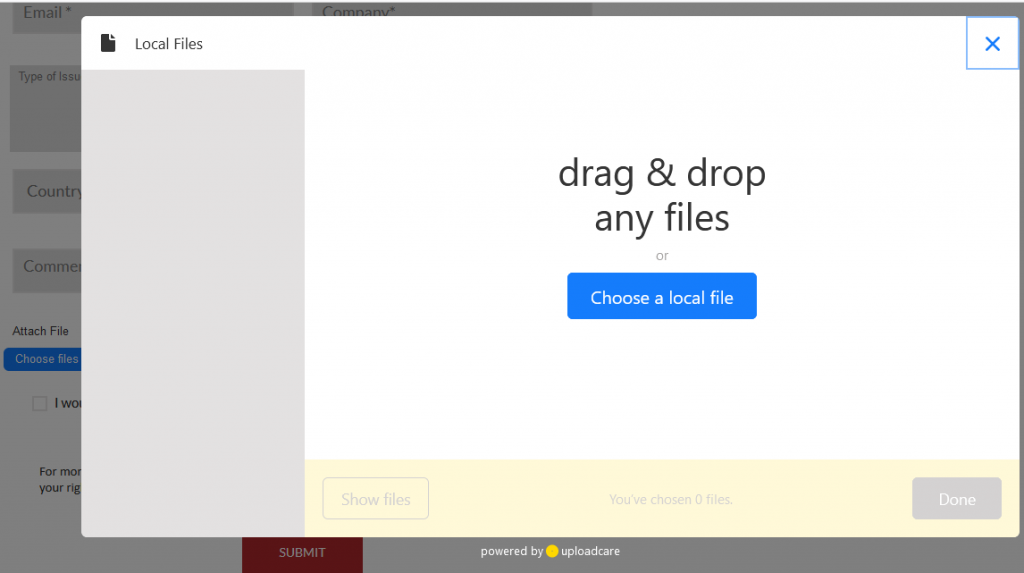
- Run the Landing Page and the choose file button which appears on this page.
- Click the Choose files button to upload one or more files.
- Added two files and clicked the Add button.
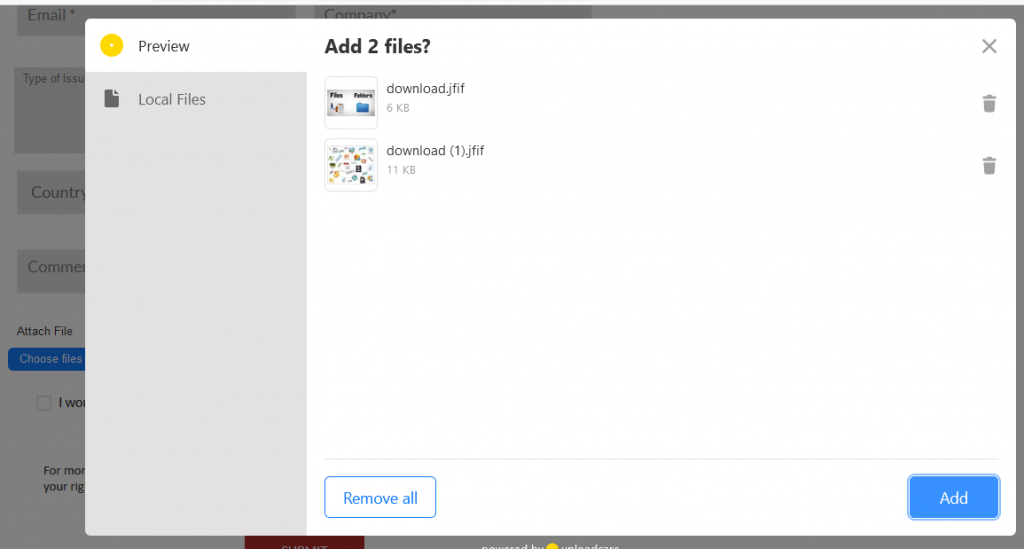
- Two files are added into upload care.
- Submit the Form.
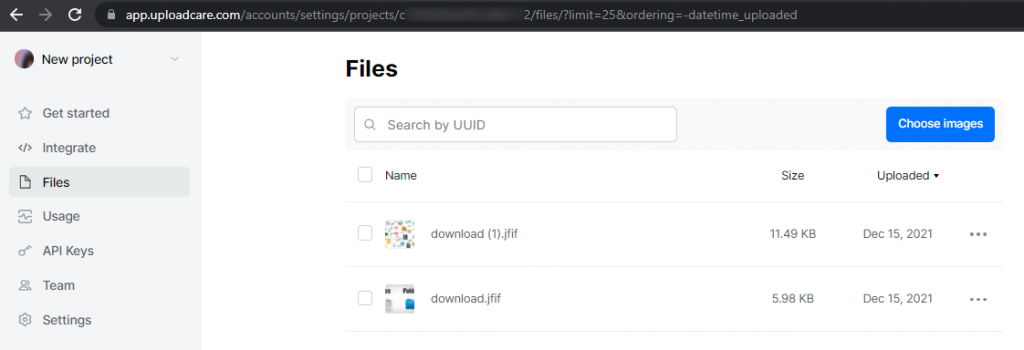
- We can see those fields added into upload care Files.
- The new lead is created in Marketo with File Uploaded URLs.

- The FileUploadedURL field stores a main URL–which means it will be treated as group/compressed file URLs. We can’t use this URL to preview our files.
- The FileUploadedMultipleURLs field stores actual file URLs. We can use this URL to see/preview the uploaded Files.
Conclusion:
Finally, we have done the Choose File button on Marketo Landing Page and the uploaded files are stored into Uploadcare system. When we click on that box, we will see a drag-and-drop interface for uploading a file along with other upload options when configuring the Uploadcare widget.
Reference Link:
