What is Calendly?
Calendly is an app used for scheduling meetings, appointments, and events.
The goal of Calendly is to cut back the back-and-forth email chain and reduce the time spend on email replies and on longer meeting preparation.
Calendly for Salesforce
The Calendly package for Salesforce has two flows. The logic of those flows is customized, and new flows are often created to best suit your business requirements.
The default flows are:
- Cancel Event Flow
- Create Event for Case Flow
- Create Event for Lead Flow
- Create or Update Lead or Contact Flow
Actions are defined within the default flows
- When a Calendly meeting event is created, if there’s no record with the invitee’s email address then a new lead record is created inside Salesforce.
- If the record exists inside Salesforce, then an event is added to a lead or case record which is related to the invitee’s email address.
- The associated event is going to be updated, and the word cancelled will appear beside the event in Salesforce.
- The owner of the Calendly event is defined by the Salesforce record lookups.
- When a new Lead record or new event record is created inside Salesforce, the owner of this record is going to be assigned a Calendly user.
Set Up Your Calendly Account
Click sign up from the Calendly page and this page will have the entire process to induce.
You need to fill a few required information. In the opening move, it’ll ask to line up Calendly URL, and zone. This URL is going to be a part of the link that you simply send to all or any event invitees.
Next, it will ask us to integrate Calendly account with our calendar and populates your Calendly schedule with any events entered into other calendars.
Then it’ll ask us to line general availability. we will change this at any time.

Calendly also asks about your work to personalize customer support; we’d like it and at last, you’ll land on the home page of your Calendly Account.
Getting started with Salesforce integration
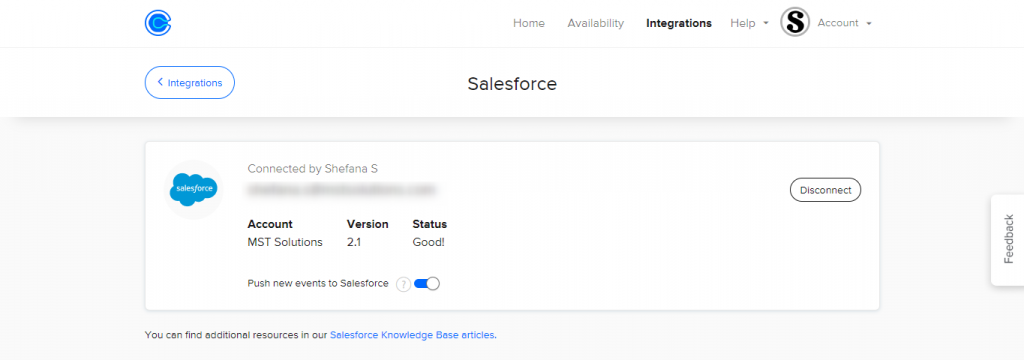
Click integration from the Calendly home page and choose “Salesforce”
Enter your Salesforce account credentials and authenticate your account.

Click the Install package link to put the Calendly package in your Salesforce account. Once installation is successful, click the refresh link.

Now, your Salesforce account is successfully connected to your Calendly account.
Creating an Event or Meeting Slot in Calendly
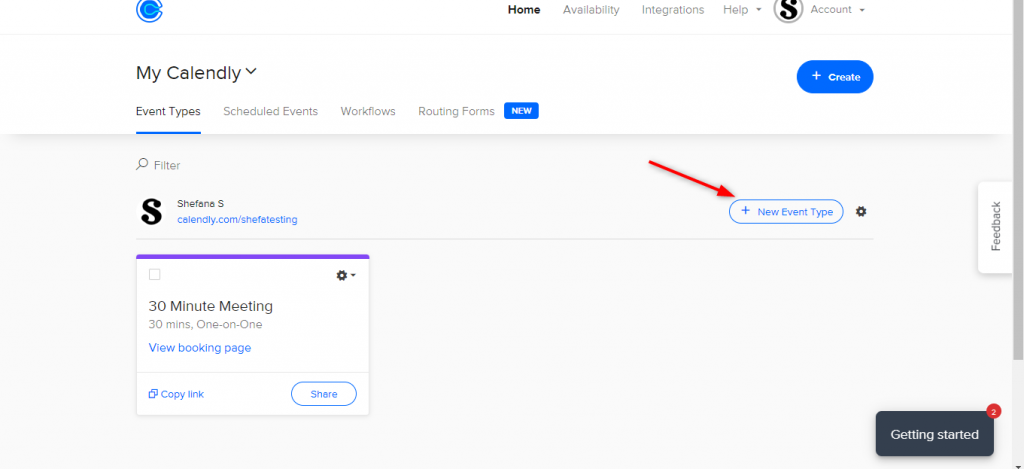
From the home page of your Calendly account, Click New event type.

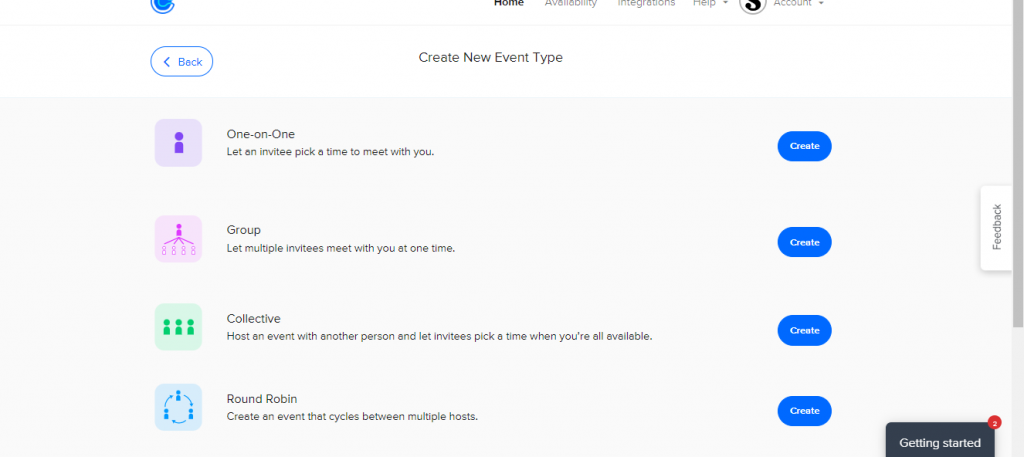
We have some forms of meetings; for now, select One-on-One and click Create.
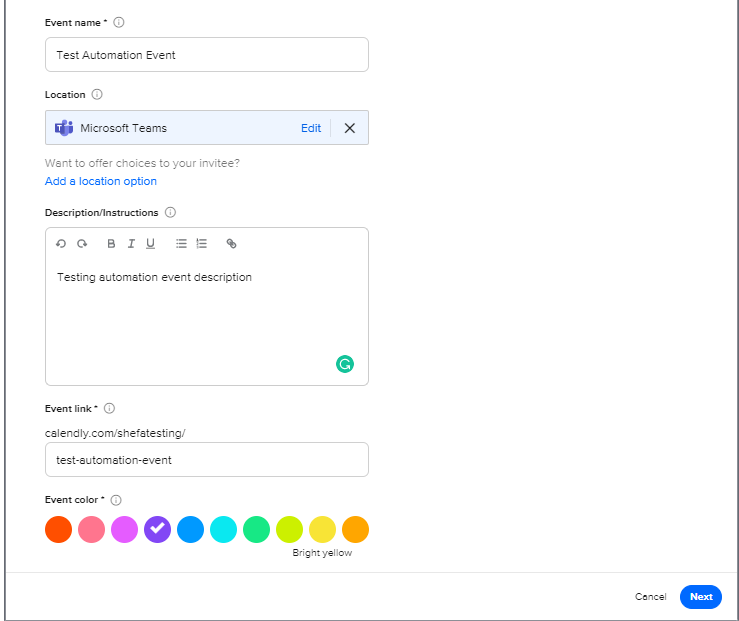
The first slide will require basic information, just like the name, location, and outline of the event. It also gives the choice to switch the event URL and therefore the label color. For the group events, we can specify the most number of candidates to attend.
In the next slide, you’ll set the duration of the meeting; likewise, as how long people can sign in for the meeting.
Below that, you’ll be able to modify your availability for the meeting, if it’s different from the one given earlier (during setup)
In the additional information section, we’ve more options to switch the frequency of events, add a maximum number of meetings per day, and set a built-in buffer time before and after meetings.
You also can hide the event from your public, a feature called Secret Event. To activate this, click the button (the default is No, but it changes to Yes when clicked).
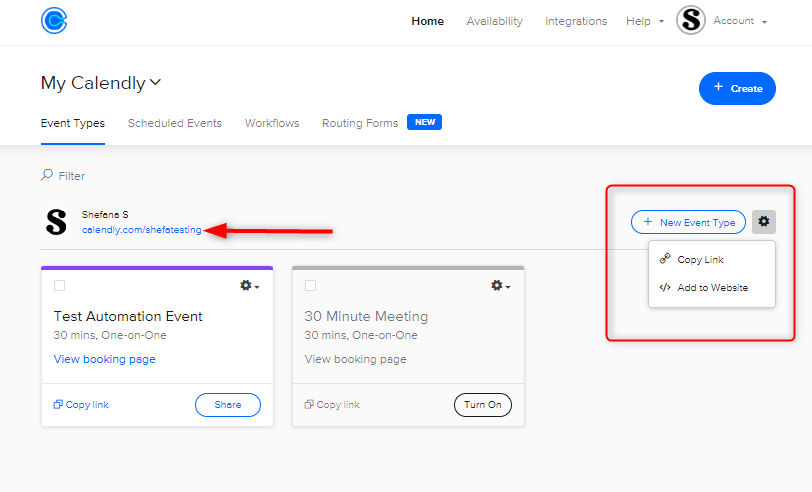
Invite People to Meetings and Share Your Calendly Link
Once you’ve created and modified all your meeting Types and created your schedule, you’ll invite people to attend or book them. you’ll be able to send them the link in order that they’ll see their options and choose the available time for them.
Clicking the share button opens the extra options of making a single-use link for a one-time booking or copying a timetable directly into the e-mail.
Share your entire calendar
The recipient can choose the event type—for example, they choose whether to schedule a half-hour or full-hour meeting. To use this feature, send the URL to your public Calendly page. The user can find this URL in your Calendly account dashboard and then copy and paste it.
you can copy the URL by clicking the gear icon within the upper-right and selecting Copy Link.

How do Invitees see in Calendly?
They can schedule meetings with you even if they do not have a Calendly account.
When the invitee clicks the URL, they’ll see the details of your calendar and event.
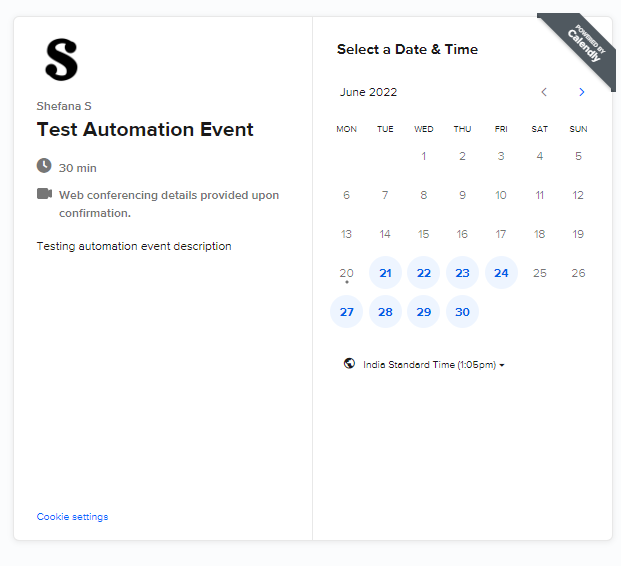
The available time slots are clickable and displayed in blue. The invitee can choose the date they like and might see the available time slots for a date.
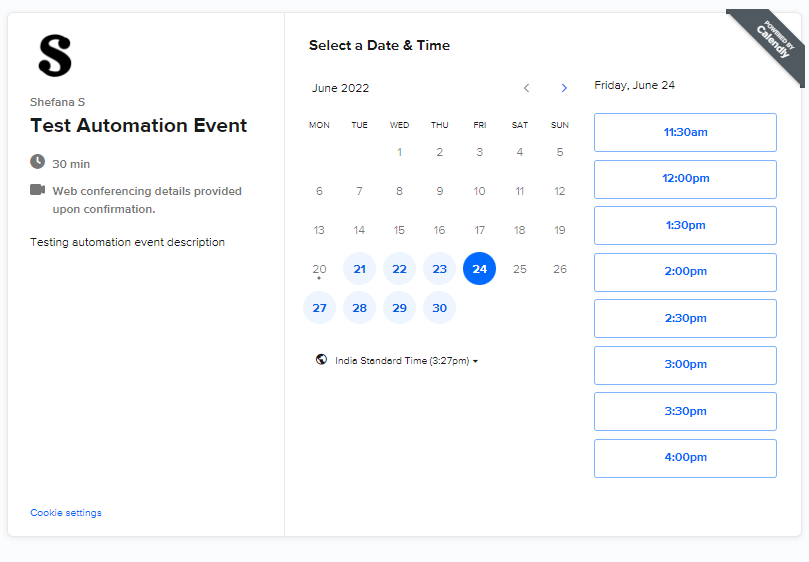
When the invitee clicks Confirm, a replacement window opens and asks for his or her name and email address. By clicking Schedule Event, it finalizes the booking. Then, a confirmation window with information, and emails is distributed to both parties. That point slot will become unavailable if a brand-new person involves in scheduling an occurrence.
References


