Flow Builder – Salesforce Configuration
Custom notifications in Salesforce are used to send custom bell notifications to notify when an important change or update occurs in your business. Salesforce Flow is one of the best ways to send custom notifications in a simple way without any piece of code.
Example
Let us consider a business scenario that requires the Sales users to be notified with a bell alert to attach the business document whenever the isAttachmentNeeded checkbox is enabled as true.
Step 1: Search for Custom Notifications to create the notification type. Click the New button to provide the name and supported channels in which the notifications should appear.

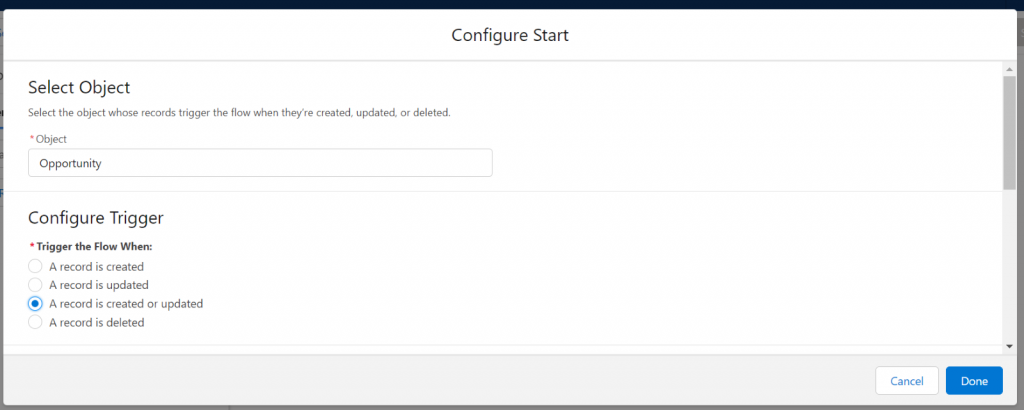
Step 2: Create a Record – Triggered flow and then choose Opportunity as the object. Then, choose the options needed to execute the logic in both insertion and modification of the record.

Ensure to add the condition that the flow runs only when the isAttachmentNeeded is true and then choose the option to execute the flow once the Opportunity is saved.

Step 3: Using Get Records element, retrieve the custom notification type created for the Sales Users using the below conditions.

Step 4: Assign the recipients using the assignment element to determine which user needs to receive the bell notification. Let’s create a variable named Recipients to store the Opportunity Owner (who is a Sales user).

Allow multiple value checkboxes should be enabled to hold multiple values for the recipients. Use the Add operator to include the owner ID into the Recipients variable in the assignment element.

Step 5: Create a Formula field with Text data type to store the notification body that contains the alert message including the merge fields to dynamically display the opportunity details.

Step 6: Use the Send Custom Notification action to send the custom notification for the Sales users. Choose the Notification Id from the Get Records created for Custom Notification Type.

Add the Recipients variable to the Recipient IDs, NotificationBody variable to the Notification Body section. Then, add the title of the notification in Notification Title and the Opportunity Id in the Target ID. Click the Done button.

The entire view of the flow will look like the below screenshot.

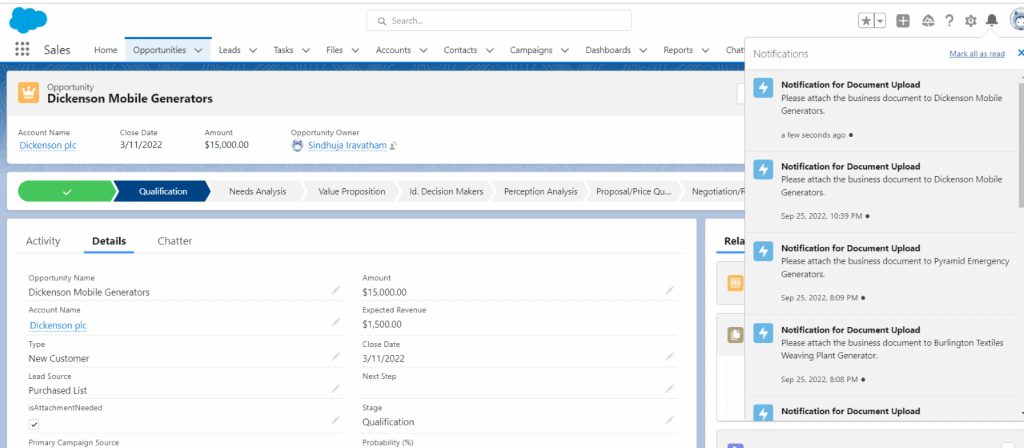
Now, when an opportunity is created or updated with isAttachmentNeeded as true, then the bell notifications will be shown to the Sales users to attach the necessary business document as in the below screenshot.

Summary
Thus, the custom notifications have been implemented in a few steps using flows in Salesforce. This powerful feature is very helpful to send bell notifications for various important business outcomes without much effort.
Reference Links


