Introduction:
Integration plays a significant role in this fast-growing IT world. Integration tools allow us to communicate and share the data between applications. Businesses are in need to have the latest integration tool to work much faster. There are too many integration tools in real world. In this article, we will see about one of the best integration tools called Zapier.
Zapier was developed by the co-founders Wade Foster, Bryan Helmig, and Mike Knoop in Columbia. This tool helped us to integrate with many apps which we are using in our day to day life, Ex – google, twitter, Facebook. It aims to cut back the human effort and to enhance business outcomes (e.g., improve customer service, expand into new markets, etc.).
Why Zapier?
Zapier is a code-free tool. Users can integrate web applications using Zapier, which helps in automating our business flows. It permits the user to collaborate, organize, and communicate with other applications.
Note:
Paid versions are also available. List of versions are Starter, Professional, Team & Company version with some extra features like unlimited Zaps, update time, unlimited users folder permissions, SAML Single Sign-On (SSO)., etc.
Among the other Integration tools, Zapier is good at providing email support within a day.
Zapier Sign up:
Let us do the following steps to Sign up with the Zapier tool.
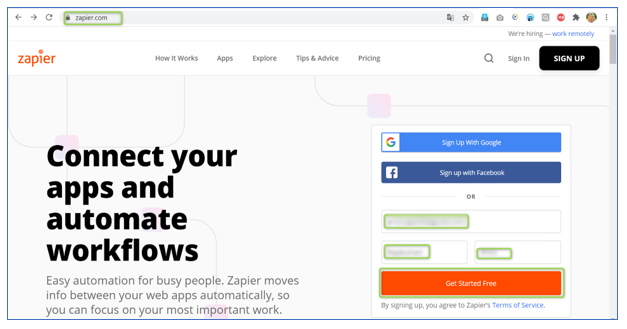
Step 1: Navigate to the official website of Zapier – https://zapier.com/
Step 2: Enter the required details in the following fields:
- Work Email
- First Name
- Last Name
Step 3: Click the ‘Get Started Free’ button
Options available in Zapier:
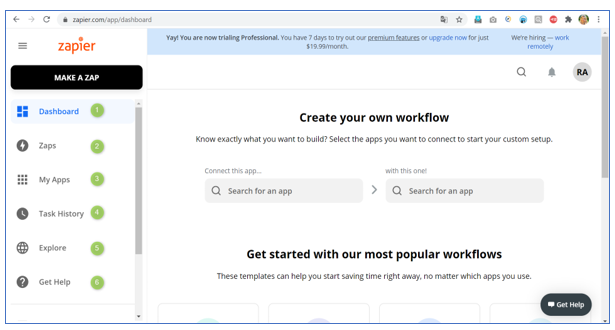
Let us see the overview of the options which are available in Zapier
- Dashboard:
In Zapier, we can make a zap by clicking on the dashboard.
- Zaps:
We can create automated tasks between two applications by clicking Zaps.
- My Apps:
By Clicking ‘My Apps’, we can see the connected apps that we use daily to automate our work
- Task History:
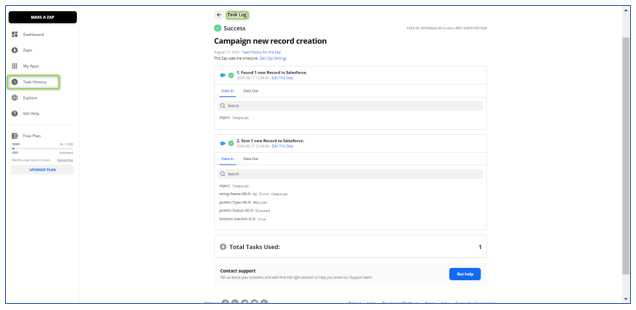
Task History will provide us the tasks our Zaps have tried to run. Task History is separated into two tabs. we can see the total number of tasks currently recorded for each of our Zaps in usage tab and we can see each individual time a Zap has run, the status of that run, and the number of tasks used in that run in Task Log tab.
- Explore:
The Explore tab indicates Zap Templates and Zapier content for application’s users have linked to their accounts.
- Get Help:
If we do not know some of the errors and unpredicted behavior in our Zaps, we can get help from the top-notch support team of the Zapier.
How to make a ZAP?
There are two methods to create a Zap. we will use Zap templates pre-built workflows or create our own Zap from scratch if we need extra customization. In this article, we will see how to create our own Zap from scratch. Following are the steps make a Zap from the scratch:
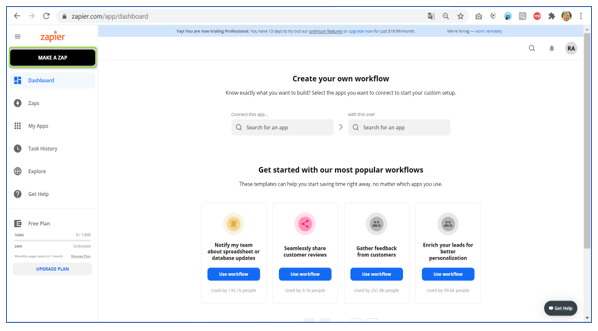
Step 1: To create a Zap from the scratch, click on the ‘MAKE A ZAP’ button, which is at the top left corner of the navigation menu.
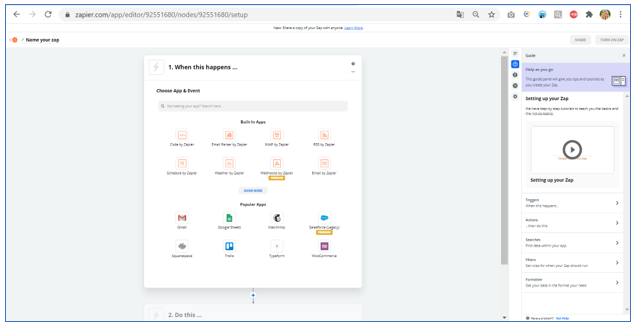
Step 2: After clicking the ‘MAKE A ZAP’ button it will redirect to the Zap editor page, where the user can set up the trigger and action of our Zap.
Let us see how we can integrate Zapier tool with salesforce:
Setting up the trigger (Source App)
A trigger is an event that starts a Zap. After we have set up a Zap, Zapier will monitor for that trigger event. Following steps will describe how to Set up the trigger in Zap: Throughout this article, we are going to integrate two salesforce systems.

Step 1: User needs to choose the trigger application in the ‘Choose App & Event’ section. In this article, we will use Salesforce as our trigger app.
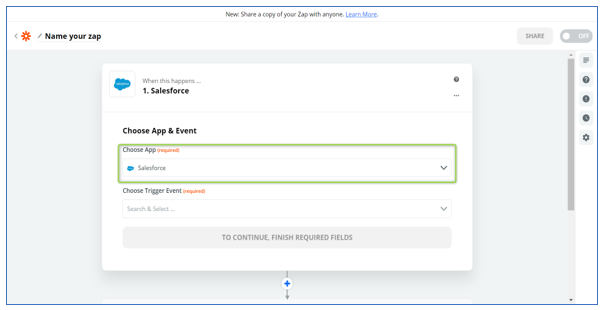
Step 2: Click the ‘Choose Trigger Event’ dropdown menu and select the event that occurs in the selected app that will trigger the Zap. Following are the four options available in ‘Choose Trigger’ Event dropdown:
- New Record – Triggers when a record of a specified Salesforce object (i.e. Contact, Lead, Opportunity, etc.) is created
- Updated field on record – Triggers when a field we choose (i.e. email address, status) is updated on any record of specified Salesforce object (i.e. Contact, Lead, Opportunity, etc.).
- Updated record – Triggers when any record of the specified Salesforce object is updated
- New outbound message – Triggers when a new outbound message is received in Salesforce
For our article, let us see how ‘New Record’ trigger event works. Choose ‘New Record’ from ‘Choose Trigger Event’ dropdown. Then, click on the Continue button.
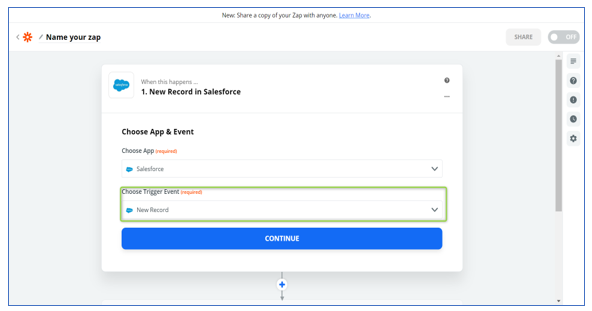
Step 3: Click the ‘Sign into Salesforce’ button to feature a brand-new account.
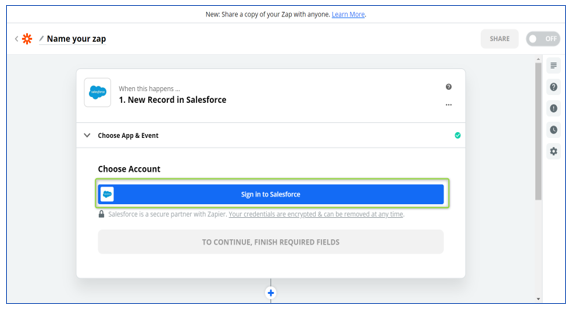
Step 4: A pop-up will appear, prompting us to permit Zapier to connect with the app. Click the ‘Yes, Continue’ button.
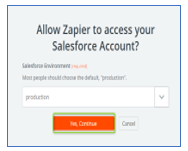
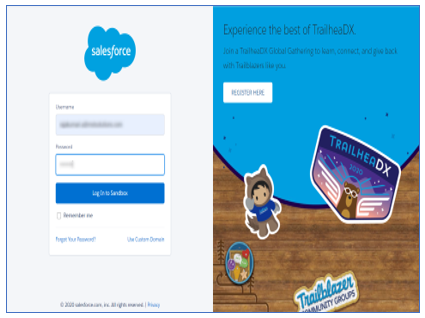
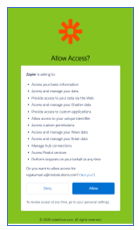
Step 5: After giving the allow access, click the ‘Continue’ button
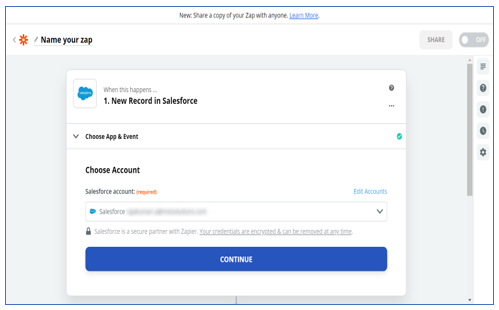
Step 6: Pick the object we need to include in the Zap. Then, click the ‘Continue’ button.
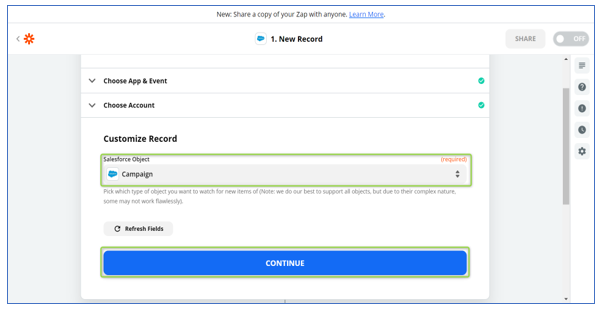
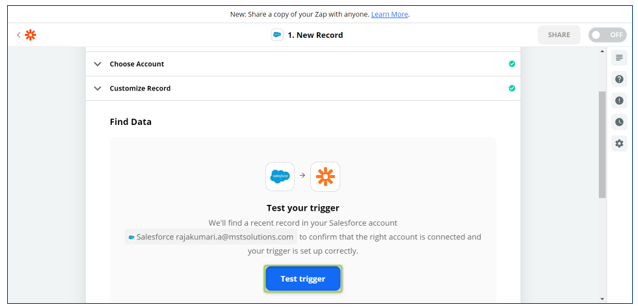
Step 7: We need to test our steps to ensure our Zap works flawlessly. Click the ‘Test Trigger’ button to ensure the trigger works.
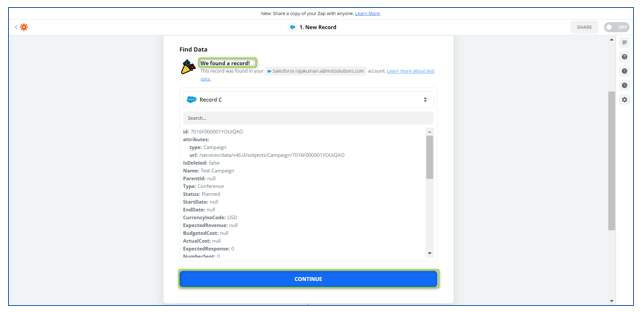
Step 8: A success message ‘We found a record!’ will appear on the screen. Then, click the ‘Continue’ button.
Note: If Zapier is facing trouble finding data for our trigger, try adding new data for the event in your trigger app.
Setting up the action (Target App):
Using this set up, we will define what action needs to be performed in the target app. Do the below steps to set up the action in Zap:
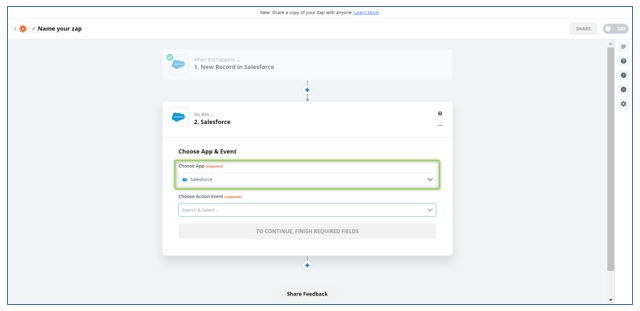
Step 1: User needs to choose the action app from ‘Choose App & Event’ section. In this article, we will use Salesforce as our action app. We can use the same source app (trigger app) or a different app
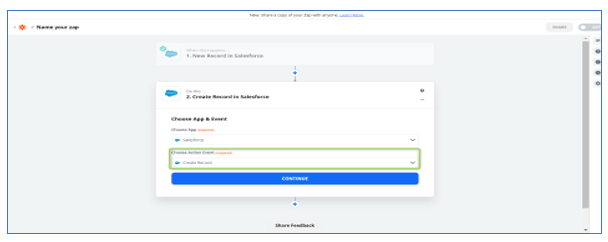
Step 2: Click the ‘Choose Action Event’ dropdown menu and select the event that occurs in the selected app that will trigger the Zap. Choose the particular action for the app with the available list of options. Following are the eight options available in ‘Choose Action Event’ dropdown:
- Create record – Create a new record of a specified Salesforce object (i.e. Contact, Lead, Opportunity, etc.)
- Update record – Update an existing record of a specified Salesforce object (i.e. Contact, Lead, Opportunity, etc.)
- Find record – Find a record of a specified Salesforce object by a field and value we choose
- Find record by query – Find a record of a specified Salesforce object using a SOQL WHERE clause.
- Add lead to campaign – Add an existing lead to an existing campaign
- Add contact to campaign – Add an existing contact to an existing campaign
- Create attachments – creates a new attachment (max 25 mb)
- Find records – Find a record of a specified Salesforce object by a field and value we choose (with line-item support)
For our example, let us select ‘Create a Record’ from choose action event dropdown. Then, click the ‘Continue’ button.
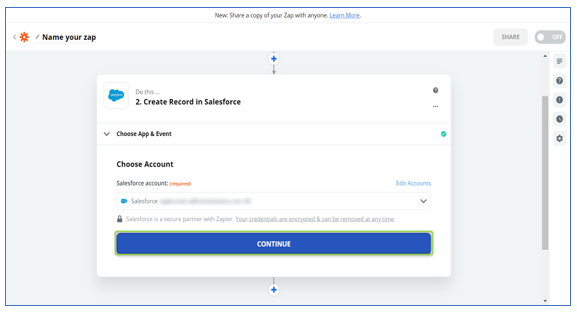
Step 3: Click ‘Add a New Account’ to feature a brand-new account
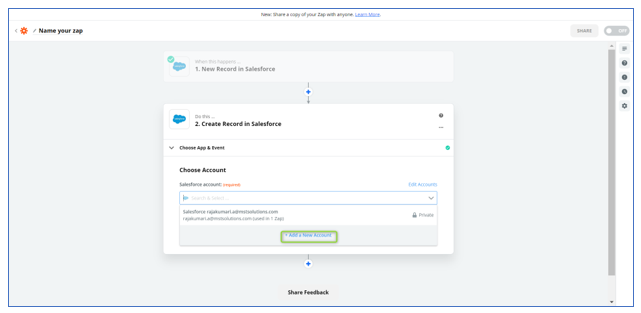
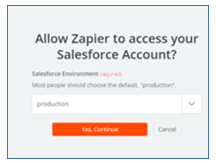
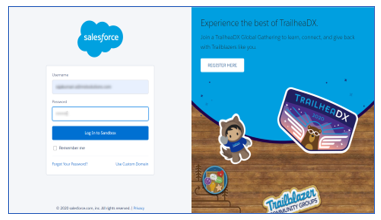
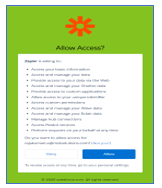
Step 4: A pop-up will appear, prompting us to permit Zapier to connect with the app. Click the ‘Yes, Continue’ button.
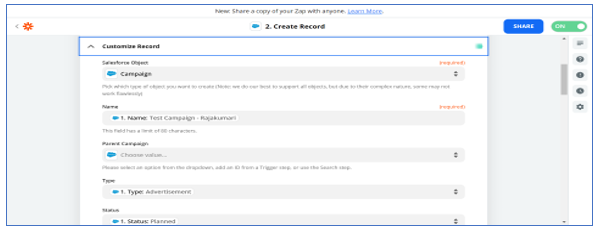
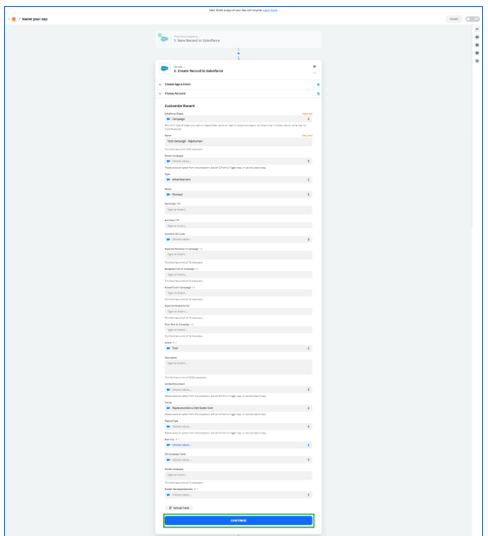
Step 4: We need to instruct the Zap precisely what we need to do with the records from the trigger app through filling in the blank fields by using the dropdown value on every field. Some fields are required. For example, if our action is to create a record in Salesforce, we need to select which field values should be created in Salesforce.
Step 5: Click the ‘Continue’ button.
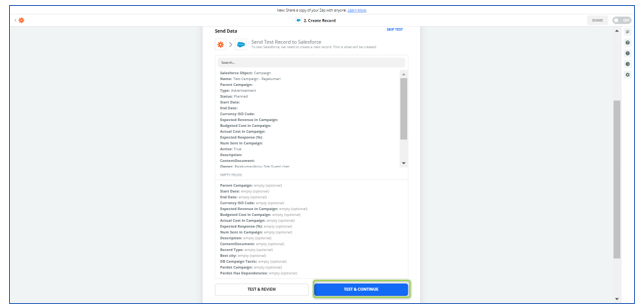
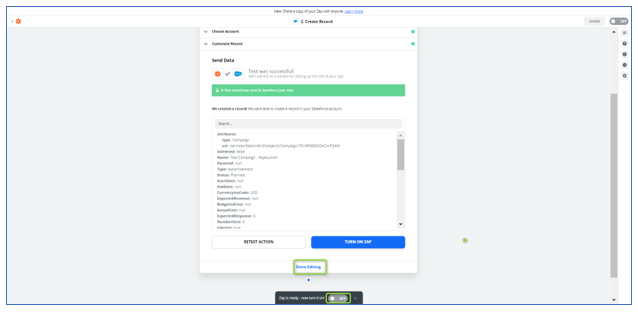
Step 6: We need to test the action. We can see which record from the trigger app will be sent to the action app. Click the ‘Test & Continue’ button to ensure this step works correctly.
Step 7: Click the ‘Done Editing’ button. Then, toggle the On/Off button at the bottom of the web page to On. Automatically Zap will run until we turn it off.

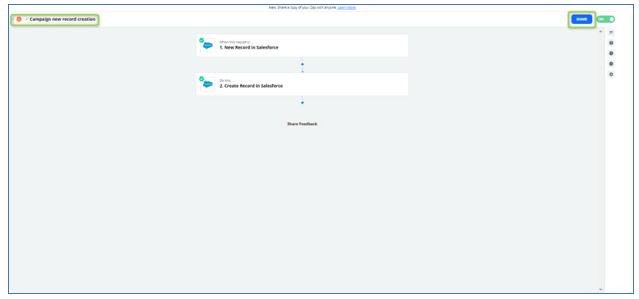
Step 8: Ensure to give a name to the Zap, by clicking the pencil icon at the top left corner of the editor, and by clicking the Share button we can Share Zaps with our team.
Example:
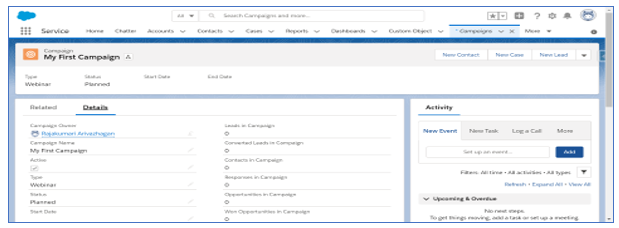
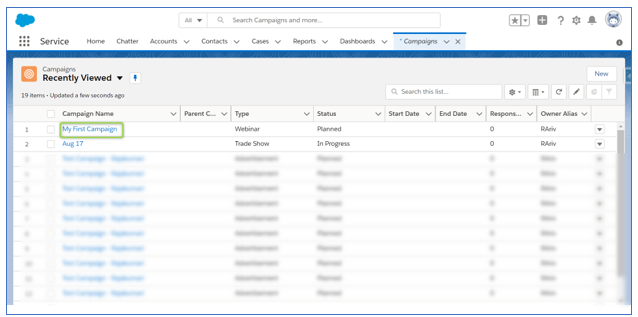
Step 1: Let us see one example for creating Campaign records in Salesforce, Log into the trigger app (source app) and create one campaign record:
Step 2: Click the Task History and verify the record is created in the Action App (Target app):
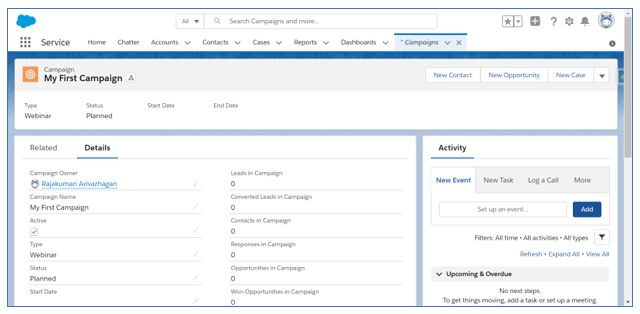
Step 3: Log into the Action app (target app) and verify the Campaign record which is created in the trigger app is same as in the action app:
Benefits of automating Salesforce with Zapier:
- Zapier is a powerful tool to integrate Salesforce with multiple applications with predefined template, so we can easily connect favorite tools and we can use visual flow builder to customize the automation
- Zapier provides custom integration with Salesforce for other application with virtual flows through API
- Zapier with Salesforce is very useful to generate leads very easily, because we can integrate Salesforce with multiple applications
- It is easy to understand and operate using point and click as well as minimal code
- Compared with other integration tools, the Zapier’s price is affordable. It offers a special discount for annual purchase and for Nonprofit organizations Zapier is giving 35% discount
Cons:
- Zapier does not support iteration process (For loop) for bulk records
- Zapier is not providing phone support to the users
References:
https://www.getapp.com/it-management-software/a/zapier/
https://en.wikipedia.org/wiki/Zapier


