This article will show you how without writing the apex code, you can upload multiple files using lightning tags only. Lightning component provides an easy and integrated way for users to upload multiple files. By using this technique, you can upload up to 10 files simultaneously.
Create Lightning Component:
Step 1:?Open Developer Console and create a new Lightning Component
Component: [LoadComponent.cmp]
<aura:component?implements=”force:appHostable,??
????????????????????????????????flexipage:availableForAllPageTypes,??
???????????????????????? ??flexipage:availableForRecordHome,??
?????????????????????????????????force:hasRecordId,??
??????????????????????????????????forceCommunity:availableForAllPageTypes,??
??????????????????????????????????force:lightningQuickAction”??
????????????????????????access=”global”?>??
<lightning:fileUpload?label=”Upload files”??
???????????????????????????????multiple=”true”??
??????????????????????????????accept=”.pdf,?.png”??
??????????????????????????????recordId=”{!v.recordId}”??
??????????????????????????????aura:id=”multipleUpload”??
?????????????????????????????onuploadfinished=”{!c.handleUpload}”?/>??
?? </aura:component>??
Step 2:? By clicking on Controller from the right side, create a JavaScript Controller for the component
JavaScript Controller: [LoadComponentController.js]
({??
handleUpload:?function?(cmp,?event)?{??
//?Get?the?list?of?uploaded?files??
var?uploadedFiles?=?event.getParam(“files”);??
//?show?success?message?–?with?no?of?files?uploaded? ?
var?toastEvent?=?$A.get(“e.force:showToast”);?
//?Displays user friendly message to user
toastEvent.setParams({??
“title”:?“Success!”,??
“type”?:?“success”,??
“message”:?uploadedFiles.length+”?files?has?been?updated?successfully!”??
});??
toastEvent.fire();?? ??
$A.get(‘e.force:refreshView’).fire();??
//?Refresh the page
//?Close?the?action?panel??
var?dismissActionPanel?=?$A.get(“e.force:closeQuickAction”);??
dismissActionPanel.fire();??
},????
})?
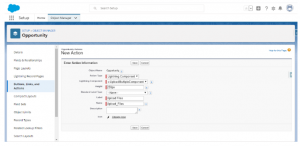
Step 3: In this step, create a Lightning–quick action button
Go to Setup –> Object Manager –> Select–Object(For example Opportunity) –> Buttons, Links, and Actions –> New Action –>.

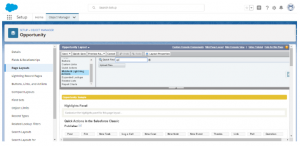
Step 4: We need to add this Quick action into Object Page Layout on this step.
Go to Setup –> Object Manager –> Select–Object(For example Opportunity) –> Page Layouts –> Select Your Layouts (For example opportunity Layout) -> Select Salesforce1 and Lightning from Left Panel and add your Quick Action into Salesforce1 and Lightning Experience Actions section

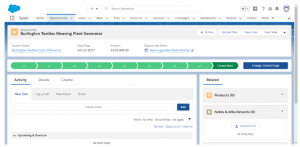
Step 5: In this step, Open an?Opportunity record click?Upload Files?action from right upload files.

Limitations:
- By default, you can upload up to 10 files simultaneously unless your Salesforce admin has changed that limit.
- The org limit for the number of files simultaneously uploaded is a maximum of 25 files and a minimum of 1 file.
- The max size you can upload is 2 gigabytes.
- In Communities, the file size limits and types allowed follow the settings determined by community file moderation. By default, guest users can’t upload files. You can enable the org preference Allow site guest users to upload files.
- This component is not supported in Lightning Out or standalone apps and displays as a disabled input.


