Introduction:
Salesforce Launched a new feature called Utility Bar available during the Creation of the Lightning App in Lightning Experience. In Spring’17 release, The Utility Bar can be easily accessed from the areas such as Recent Items and Reports, Lightning Voices & Notes etc. We can find the utility bar under the related list page. We can add the Utility Bar to the Standard and Console Apps. Before this feature was introduced, we could add or customize this feature only using API.
Steps to Implement the Utility bar:
Step:1
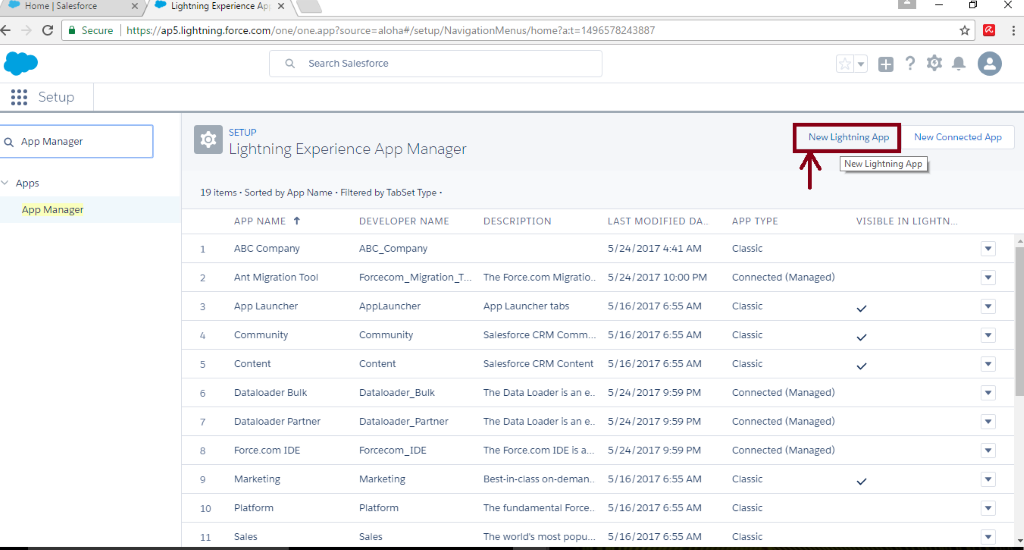
Create a New Lightning App Using App Manager in the Lightning Experience.
Go to Setup—>App Manager—–>New Lightning App
Step:2
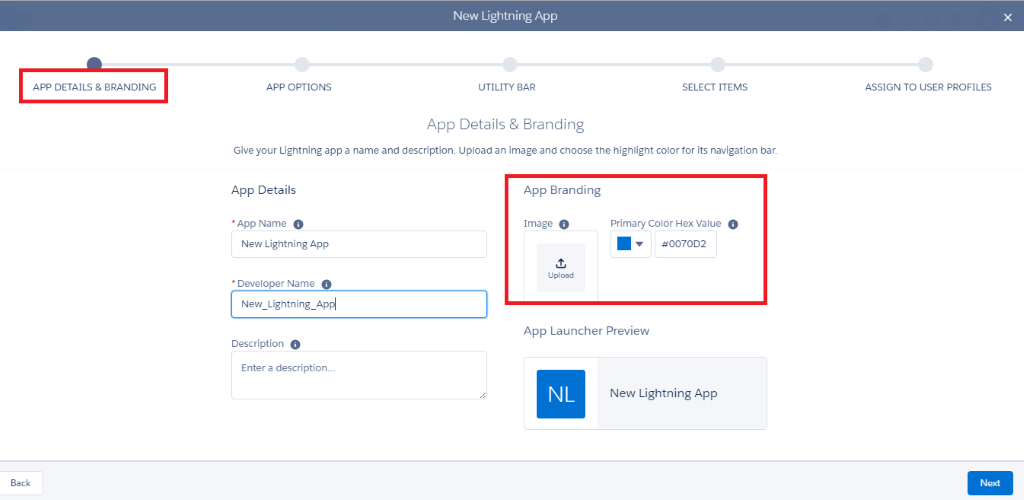
We must Create the App Details and Branding for the app. Here, we must enter the app name and description and we can able to set the Image and select the Highlight color for the Navigation Bar.
Step:3
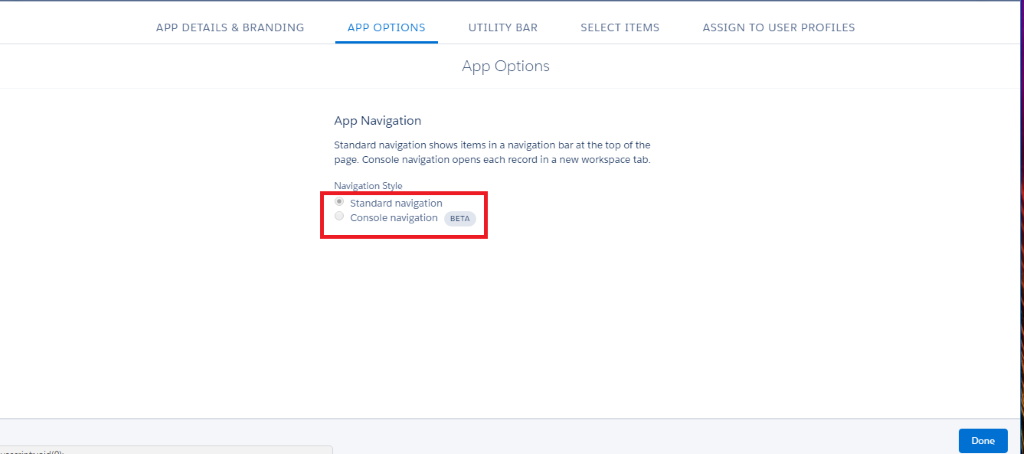
After that, we must set the App Options that consists of two Styles.
1.Standard Navigation—It shows Items in a navigation bar at the top of the page.
2.Console Navigation (Beta Version)—It’s used to Open each record in a row workspace tab.
Note: Here, we saw Utility Bar in the Standard Navigation.
Step:4
After Finishing the Step3, we will navigate to Utility Bar Step, it’s used for quick access to the items like filter list, recent items, reports, etc. in the Docked Panel. In the Utility bar, we have to set the Utility Item properties, like setting the Label Name, Icon, Height and Width of the Panel. When the app is loaded, at the same time Utility Bar is also loaded in the Background if you enabled the Checkbox. Component Properties are also used in the utility bar. It’s used to select the options based on the added utility Item.
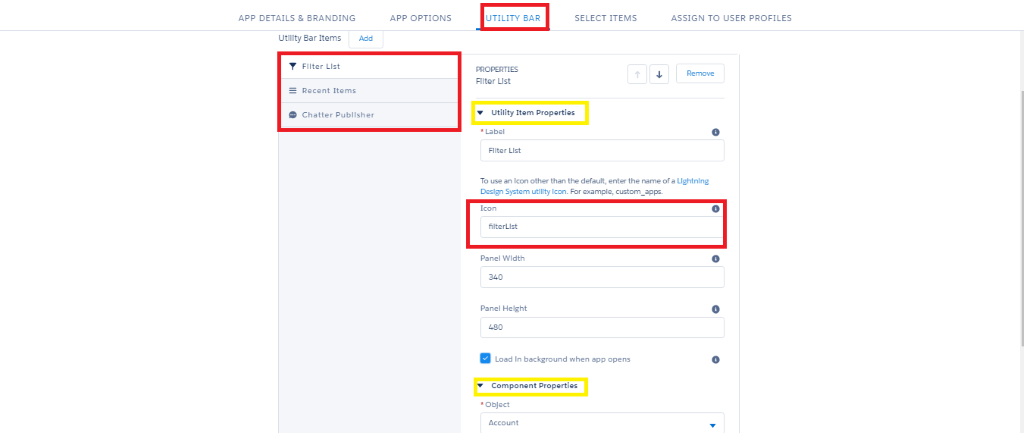
Note: In Spring’17 release, if you want to set the Icon for Utility, click the link (Lightning Design System Utility Item). It will be redirected to new browser tab.
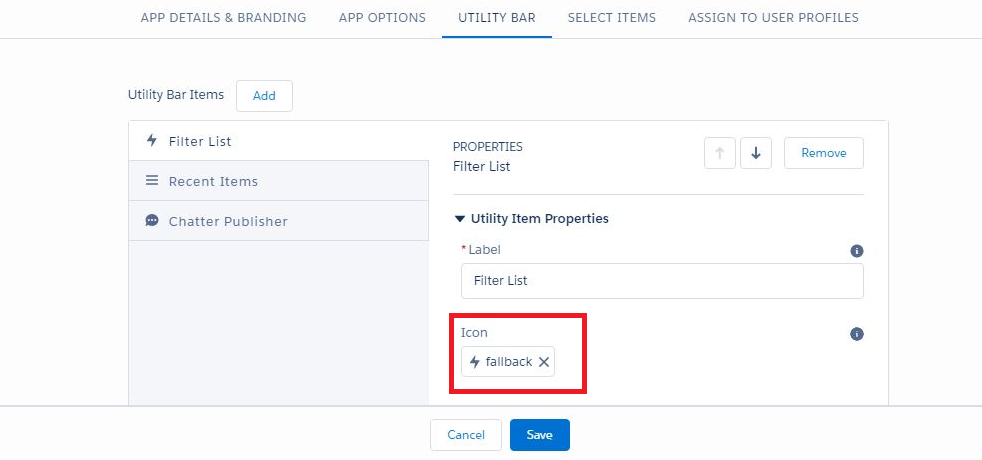
Update: In Summar’17 release, you can choose Icons for your Utilities directly. By default, we can use the fallback icon, but we can’t change the icon for some Utilities like Notes and History.
Steps to Implement the Utility Icon:
- Setting the default Icon for the Utility.
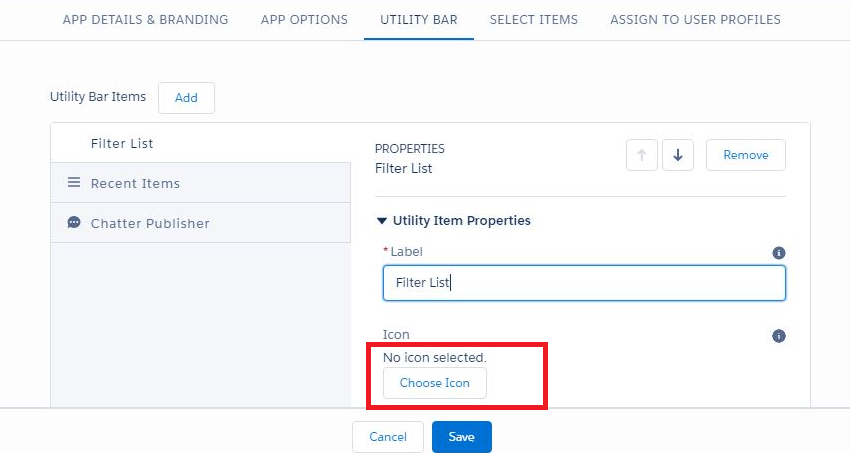
- Click the Choose Icon button for Utility Item.
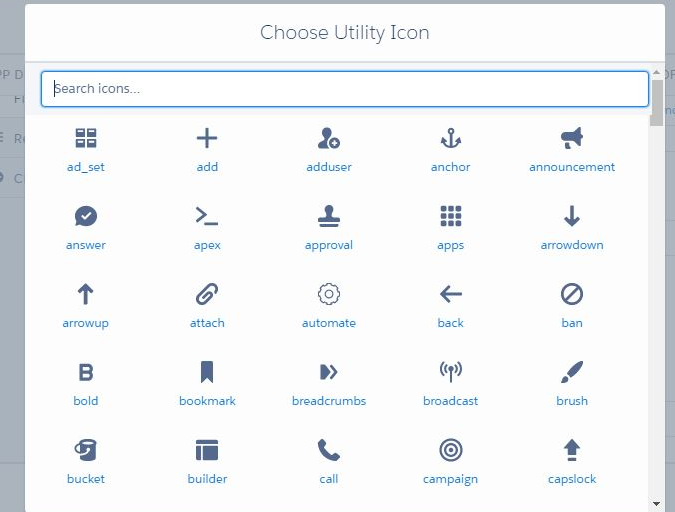
- Here, we can change the existing icon with the new icon by selecting any one.
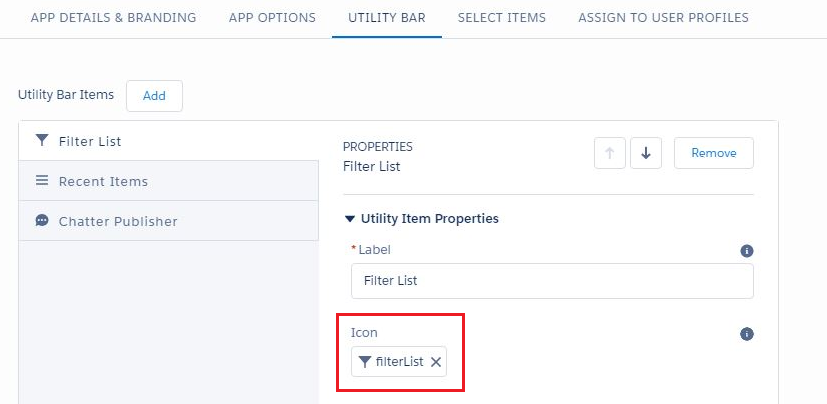
For Example: If you want to set the Icon for Filter List

Step:5
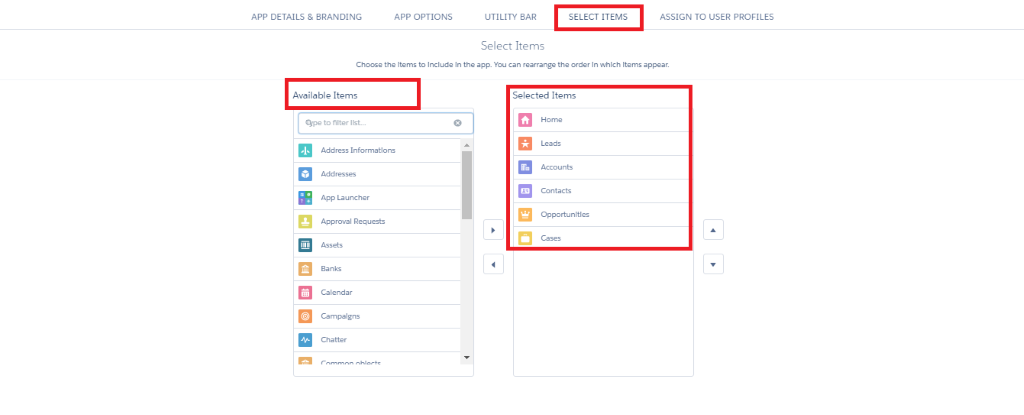
After finishing the step 4, we should select all the objects we need to show in the navigation bar for this app. Choose the appropriate objects from the Available items and move it to the Selected Items.
Step:6
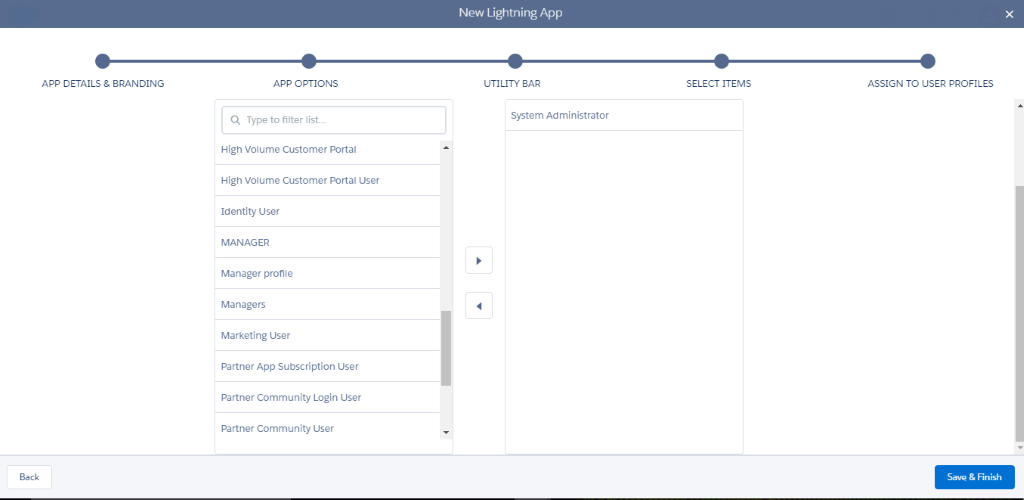
After completing the step 5, we must assign the App to User Profiles like System Administrator or other users. We should select the user profiles based on our requirement.
Step: 7
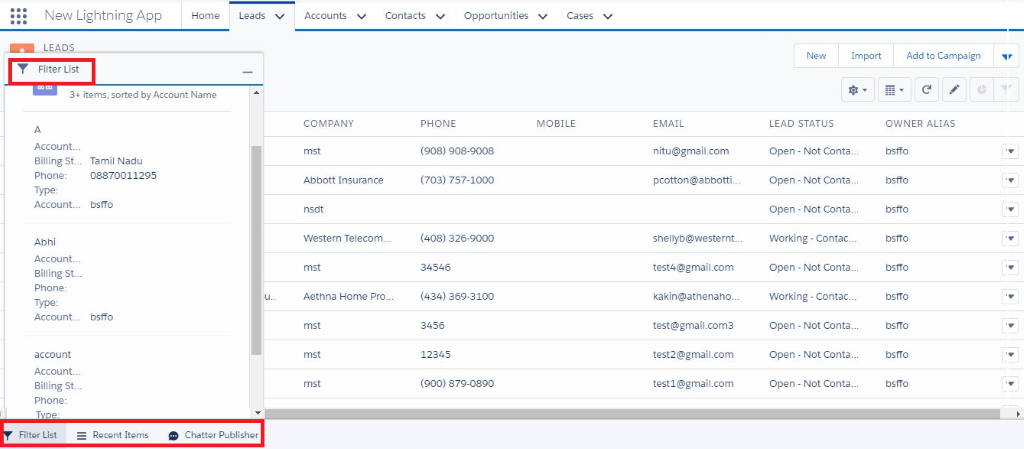
Once we have finished the above steps, we can access the App in the Lightning Experience. Here, We can access the account related filter list and Recent Items & Chatter Publisher in the Single User Interface. In that Utility bar, we can add up to 10 Utilities.
Conclusion:
If you are setting up a Lightning console app, add the History Utility to show users their recently visited primary tabs and subtabs. The History utility works in Lightning console apps only.
References:


