Introduction
WalkMe is a leading digital adoption platform that transforms the user experience by closing the gap between humans and technology. WalkMe’s Digital Adoption Platform for Sales enables Sales organizations to realize the true value of their entire Sales digital ecosystem through in-app guidance, engagement and automation tools directly on top of, and across Sales applications.
Salesforce Data Integration
Data from WalkMe Insights is accessible in Salesforce and can be used in workflows, reports, and activities using the Outgoing Integrations in Insights Data Integration Center. This data is synced every 24 hours at 9:00 am UTC.
Working
Using the Salesforce integration, you can push WalkMe Insights data into Salesforce objects to enhance your understanding of end users’ online interests/trends.
During the setup process, you need to choose the Salesforce object to push the data into & which data you want to be pushed into Salesforce according to an Insights custom report.
If there is a match found between the custom report’s unique identifier (usually email/GUI) and the Salesforce object’s unique identifier (usually email), then you can push the data found in the insights report to this object.
- You can sync any Salesforce object
- You can sync to both Salesforce environments: Production and Sandbox
Authentication Method
We can use the Salesforce OAuth 2.0 authorization method to obtain a token (that we store) for the end-user. This access can be revoked at any time by the Salesforce Admin or within the system by disconnecting the account.
Pre-requisites
- You should be a Salesforce Admin or contact your Salesforce Admin in order to add custom fields to your targeted Salesforce objects
- You should have a Salesforce user that either has Salesforce Admin access or?ModifyAllData?permissions to grant WalkMe access to OAuth 2.0 authorization to read and update the metadata of Salesforce objects (Note: This access can be revoked by the Salesforce Admin at any time)
The Data Integration Centre User Interface is in the Insights console under Integrations –> WalkMe to Salesforce. From then, the integration wizard will walk you through the process of setting up an integration.
Note:
The WalkMe to Salesforce integration does not create new records on Salesforce, only updates existing ones.
Getting Ready for Integration
Step 1: Identify the Pertinent Data
- First you need to determine which WalkMe Insights data must be pushed to Salesforce in order to achieve your chosen goal(s). The data must be found in a report in a specific structure:
- Each row on the report should stand for a specific record of the object you want to integrate to (for example – each row could be of an end user).
- Each column of the report should stand for a specific field on Salesforce you want to push the data to.
- There should be 1 column in the report that holds the mapping key for your record on Salesforce. For example, by the way you will identify your target object records on Salesforce is an email, then this email should be a column on the report.
- Exporting or downloading the report from Insights Reports Page before setting up the integration is required.
Step 2: In Salesforce, Add Custom Fields to the Salesforce Object
This can only be done by your Salesforce Administrator. It is highly recommended to use the prefix?WalkMe_?to preface each of the Salesforce custom fields.
Integration
Step 1: Select your Integration
Log into your Insight Console by providing Username and Password in the url: https://insights2.walkme.com/. Click the header “Integrations” in the left sidebar and click on Outgoing Scheduled Integrations- “WalkMe to Salesforce”
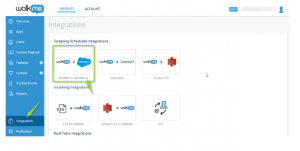
Step 2: Connect the Environment
Connect your first Salesforce environment:
Click the [ADD ACCOUNT] button next to the environment to which you want to connect.
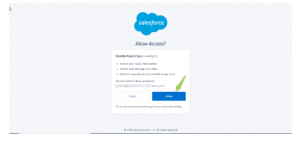
You will be navigated to the Salesforce authentication screen, where you will give WalkMe permission to push data to this account using the OAuth 2.0 authorization process .
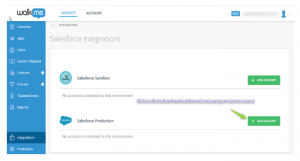
Enter your Username & Password and Click the [Allow] button on the next page. Make sure to log in using a Salesforce user account that is a Salesforce Admin or has ModifyAllData permissions.
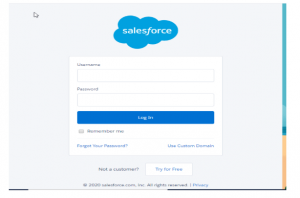
Otherwise WalkMe will not be granted permission to push the data to Salesforce.
Once you enter the username & password of your account, you will be redirected back to the Salesforce integration section of the Insights console.
Step 3: New Integration
Start your first integration:
User will be navigated to “New Integration” wizard directly once done with OAuth Verification. if not Click the?[CREATE NEW INTEGRATION]?button to start the integration wizard.
Note:?if you wish to add another account to connect your Sandbox or Production environment, click the?ACCOUNTS?button at the top-right of the screen.
Step 4: Select an Environment in Integration Wizard
Here you will select between the different Salesforce environments connected to WalkMe.
You can view the Salesforce account details and can select between Sandbox and Production (if both are connected).
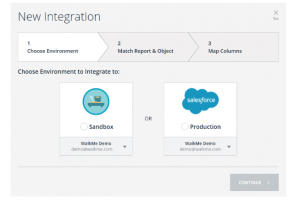
Note:?You may select only from among the connected environments (if only one environment is connected, only that one will appear). ?
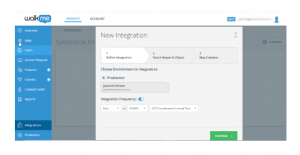
Step 5: Select the Insights Report & the Matching Salesforce Object in Integration Wizard
Select the option “2. Match Report & Object” and choose an Insights report and select the Salesforce object with which it should be synced.
Selected Report:
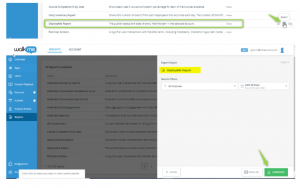
On the Insight, click the “Reports” tab and it will display the list of default Reports available in the Insight.
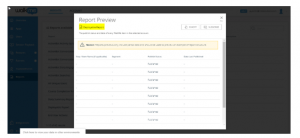
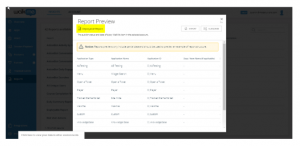
Preview: Click on the eye icon right next to the Report you need to Preview the Reports’ data
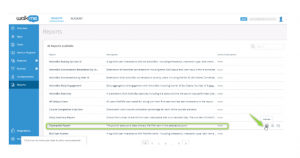
Export: You can also “Export” the Report directly by clicking the Export icon next to Eye icon;or Preview the Report and click the [Export] button.
Note: Preview and Export are the ways that you can confirm the Column and Report data before starting Integration.
Reports -> Export ->Download
Reports -> Preview -> Export
Salesforce Object:
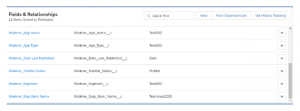
User can use the existing Custom or Standard Object but it is required to create the related fields with prefix “Walkme_” for mapping Walkme Insight data in Salesfoce.
Here, for better understanding, we have created a custom Object “App” and the related field prefix with “Walkme_” to map the Walkme Insight data.
Choose Insights Report column –Select a value from the picklist list containing your available Insights reports.
Choose target Salesforce object column – Select a value from the picklist containing the available Salesforce objects pulled from Salesforce (per the environment accessing the Salesforce metadata)
Once you selected value for both picklists, select the unique identifiers (keys) of each report and match them up with a Salesforce object identifier (usually email or GUI)
Insight report unique identifier column– Select a value of report’s key to match to a Salesforce object
Salesforce object unique identifier column –Select a value from the listed Salesforce object with which to match the report key
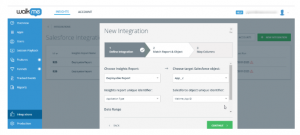
Click the?[Continue]?button to proceed. Click the?Back?button if you wish to return to screen 1.
Note: Each Salesforce identifier may only be matched with one unique report Identifier per integration
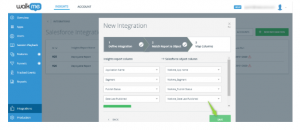
Step 6: Map Fields to Update in Integration Wizard
Here, you must decide what data will be updated in Salesforce. This mapping provides the end-user with a User Interface showing what data from the source report are updated in the Salesforce object.
The?Insights report column?consists of all the fields found in the report, also includes the key field selected.
The?Salesforce object column?consists of all the fields of the selected object which:
- Are not already in use in previous page
- Correspond to the keys selected on previous page
- You can click?ADD COLUMN?to add another mapping of fields to objects
- When hovering over a row, you can click the?[X]?button to delete that row
- Once completing one or more mapping rows, the?[SAVE]?button will be enabled
- Click the?[Back]?button to return to the previous page
Step 7: Execute your integration
Hover over the integration you just created and click the [Run Now]?icon.

This will execute the integration and will attempt to push any relevant data to the assigned object. If executed properly, both the log and grid will indicate the integration completed successfully.

Editing an Existing Integration
Hovering on a specific integration in the Insights console, the?[Edit]?button appears.
When the?Edit?button is clicked, the integration wizard opens allowing you to edit the integration. The wizard will open to previous page to allow you to easily edit the mapping.
You can navigate Back and Front & between the screens using the headers and buttons.
Logs
Whenever a sync occurs, a log is created. The log can be found by clicking the three dots next to the pencil icon that appears when you hover over an integration in Insights’ Integrations section:
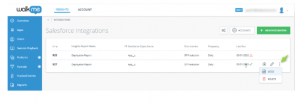
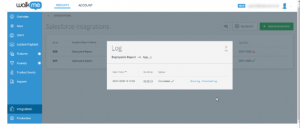
When you click?Log, an overlay window appears, and you can view the history of the data pushes made from WalkMe to Salesforce
The log contains the Report name, Salesforce object of the integration, and the below information:
- Start date: The date time of the run in UTC hours
- Runtime: The run’s duration (difference b/w End Time & Start Time)
- Status: The run’s status –?Completed?or?Failed
- You can perform these actions:
- Show log?link: On hover, you can view the original log with all details by clicking the?‘Show log’?link.
- Click the?[X] button to close the overlay window.
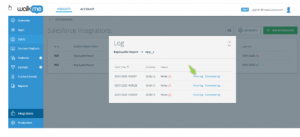
Log (Completed):

Log (Failed):

Conclusion:
WalkMe guides sales team increases productivity and ensures adherence to procedures and data integrity that help scale the business and provides true visibility across platforms.


